ServiceNow
Overview
VulnCheck helps organizations outpace adversaries with vulnerability intelligence that predicts avenues of attack with speed and accuracy. The VulnCheck team comprises a who's who of cybersecurity research, with decades of experience uncovering 100s of 0 days and 10+ patents. VulnCheck's vulnerability and exploit intelligence equips defenders with the insights they need to focus resources on the vulnerabilities that matter most. That's why VulnCheck has been selected to power government agencies, large enterprises, and the industry's most innovative cybersecurity solutions, covering billions of assets around the world.
This integration between Vulnerability Response and the VulnCheck application enhances vulnerability data and pulls vulnerable item details from VulnCheck. It facilitates the creation of Vulnerable Items and enables organization-wide vulnerability management within a ServiceNow instance. By utilizing VulnCheck's functionalities, businesses can simplify the tasks of vulnerability identification, assessment, prioritization, and remediation. This integration ensures extensive visibility and centralized oversight of the vulnerability management lifecycle.
Application Features
- Ability to configure authentication details and filtering options.
- Ability to configure the integrations.
- Ability to view Vulnerabilities populated and other related tables.
- Ability to run enrichment on a specific vulnerability and a set of vulnerabilities by providing their IDs.
Compatibility Matrix
- ServiceNow Version: Washington DC, Xanadu and Yokohama
- VulnCheck API Version: V3 used for vulncheck-nvd2, exploits endpoint.
Configuration Instructions
Installation
This section describes how to download and install the “VulnCheck for Vulnerability Response” from the store.
Pre-Requisites
ServiceNow Plugins
- Vulnerability Response (sn_vul) - v24.1.6
- Vulnerability Response Integration with NVD (sn_vul_nvd) - v1.5.3
- Vulnerability Exposure Assessment (sn_vul_analyst) - v4.0.1 (optional plugin)
Permission and Roles
VulnCheck for Vulnerability Response can be used by users having the role x_cdsp_vuln_vr.vulncheck_vr_admin, sn_vul.admin.
| User | Role | Permissions | Description |
|---|---|---|---|
| App Admin | vulncheck_vr_admin | Installation of the application, Configuration record and filters, Integrations, Enrich NVDs on demand, Data Sources, System Properties, Application Logs, Support Contact, Privacy Policy | The user of this role will be able to configure the application and run the integrations. |
| sn_vul.admin | Access to tables from application scope of Vulnerability Response Integration with NVD | The user with this role can have access to tables like sn_vul_nvd_entry, sn_vul_software, sn_vul_exploit, sn_vul_reference, sn_vul_cwe |
VulnCheck for Vulnerability Response
Steps to install the application from the ServiceNow Store:
- Users with the System administrator(admin) role can install the application from the ServiceNow Store.
- Go to https://store.servicenow.com
- Search for the “VulnCheck for Vulnerability Response” on the search tab.
- Click on the VulnCheck for Vulnerability Response.
- Click on the “Get” button and enter the HI credentials of your instance.
- Once it is added successfully, open the instance and Navigate to Applications > All Available Applications > All.
- Find the application using the filter criteria and search bar.
- Next to the application listing, click Install.
Configuration Instructions
Create Users
Note:- This step is optional, if you do not want to create a user, then System Admin can access the VulnCheck Application. The ServiceNow platform admin creates the various users.
| Username (for example) | Role to be assigned |
|---|---|
| App Admin | x_cdsp_vuln_vr.vulncheck_vr_admin, sn_vul.admin |
Below is an example showing how to create a user and assign the role to it. Role Required: System Administrator (admin) Procedure:
- Navigate to “Organization” -> “Users”.
- Click the “Users” module.
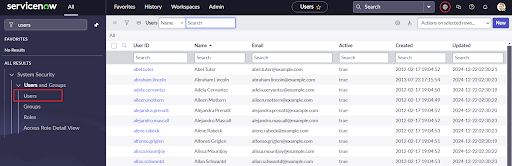
- On the Users list that is displayed, click “New”. A new user form is displayed
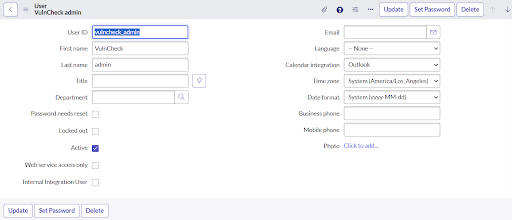
- Fill in the form.
Note: The values for User ID title, and email address shown in the following table and figure are example values.
| Field | Description |
|---|---|
| User ID | Unique User ID for the role in your ServiceNow Platform instance. An example is vulncheck_app_admin. |
| First Name | First name of the person, you are assigning |
| Last Name | Last name of the person, you are assigning |
| Title | Job Title, for example, DataBee admin |
| Password | The unique password created for this role |
| Unique email address | |
| Timezone | Select the time zone from where the user is working. |
- Click “Submit”. Once submitted, you can assign the role.
- On the Users list in the User ID column, click on the name of the new user you created, for example vulncheck_app_admin.
- Once the record is open, the Set password UI is visible in the form view of the record.
- Click on the Set Password UI action.
- One pop-up will be displayed. Click on “Generate”. This will generate a unique password for the created user that needs to be changed on the first log-in.
- Copy the generated password and close the popup.
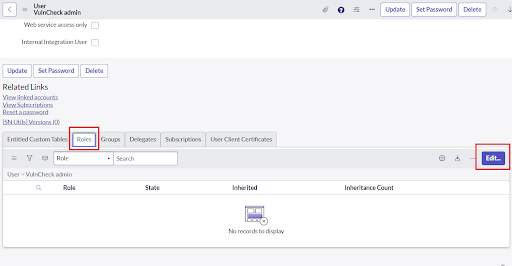
- On the Users list in the User ID column, click on the name of the new user you created, for example vulncheck_admin.
- Once the record is open, go to the Roles section, and click “Edit”.
- Add vulncheck_vr_admin in the collection field of Edit Member form.
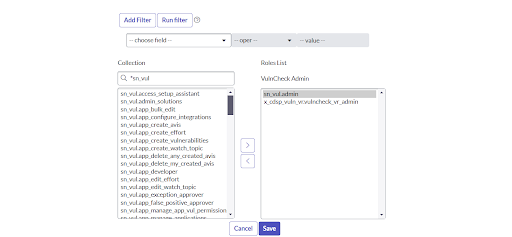
- In the Collection column, select vulncheck_vr_admin and move to the Roles List.
- Likewise perform the same steps for adding other roles.
- Click “Save”.
Use Cases
Authentication and Filter Vulnerabilities
This section describes how to authorize the App to fetch data from VulnCheck. This module will help the user to validate the API token and add the filter components. Any condition specified here will be applied to filter out the incoming vulnerabilities.
Provide authentication credentials and filter options
- The user needs to navigate to the system properties table by entering sys_properties.LIST.
- Search for the Name x_cdsp_vuln_vr.host_url and open the system properties record available and provide the value for host URL used for the VulnCheck API.
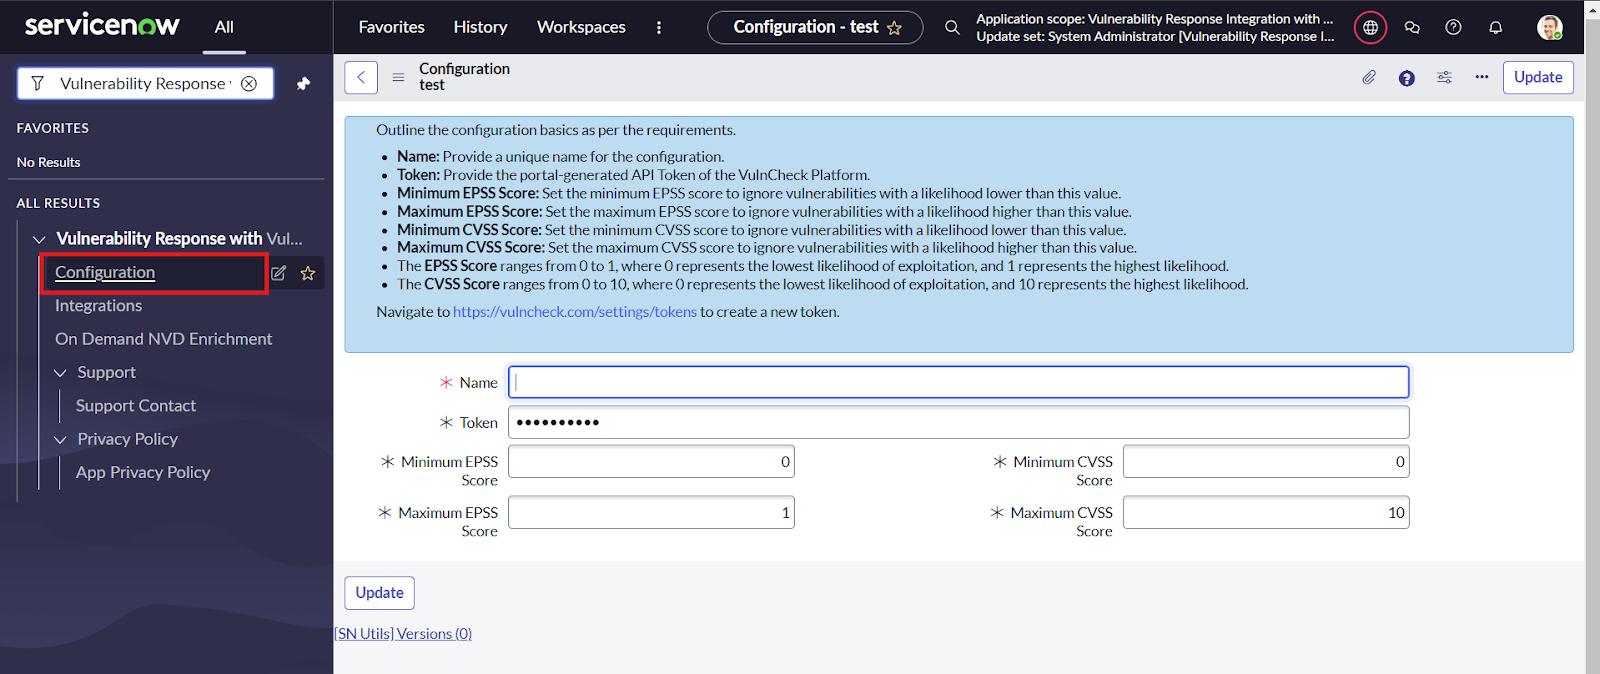
- Next navigate to Vulnerability Response with Vulncheck -> Configuration. This opens the default record.
- Here the user needs to provide the Name for the configuration record shipped.
- The user needs to provide the Token for the API, this can be generated by visiting https://vulncheck.com/settings/tokens
- Users can modify the filter options for the fields: Minimum EPSS Score, Maximum EPSS Score, Minimum CVSS Score, and Maximum CVSS Score. The values entered in these fields are used to filter the vulnerabilities for mapping into the SNOW tables. If no values are specified, default values will be applied.
- Click on update and look for the successful validation message, an error will be displayed in case of incorrect host URL or Token input.
Fetch Vulnerabilities from VulnCheck Platform
“VulnCheck for Vulnerability Response” provides functionality to fetch Vulnerabilities and related information from VulnCheck and store them as vulnerabilities and populate the related table.
Vulnerability information is fetched through two integrations: “VulnCheck NVD Integration” and “VulnCheck Exploit Integration.”
- VulnCheck NVD Integration: This integration is set to run daily. It fetches vulnerabilities from the Vulncheck platform and populates the ServiceNow tables.
- VulnCheck Exploit Integrations: This integration is set to run on demand and is triggered after VulnCheck NVD Integration is completed. Hence no user intervention is required. It fetches the exploits associated with vulnerabilities and populates the required tables.
Role Required:x_cdsp_vuln_vr.vulncheck_vr_admin Procedure:
- Login to the ServiceNow instance.
- Navigate to “VulnCheck for Vulnerability Response” and under it click on “Integrations”.
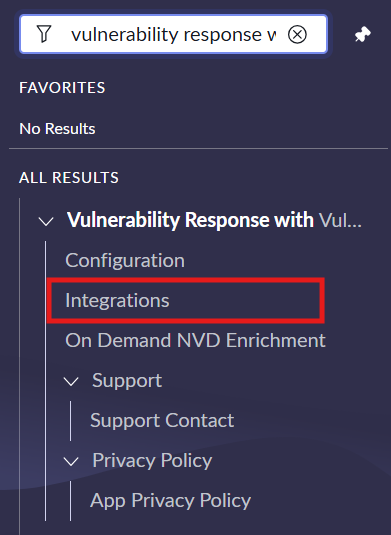
- Select Integration with the name “VulnCheck NVD Integration”.

- Activate the "Active" checkbox and click the 'Update' button.
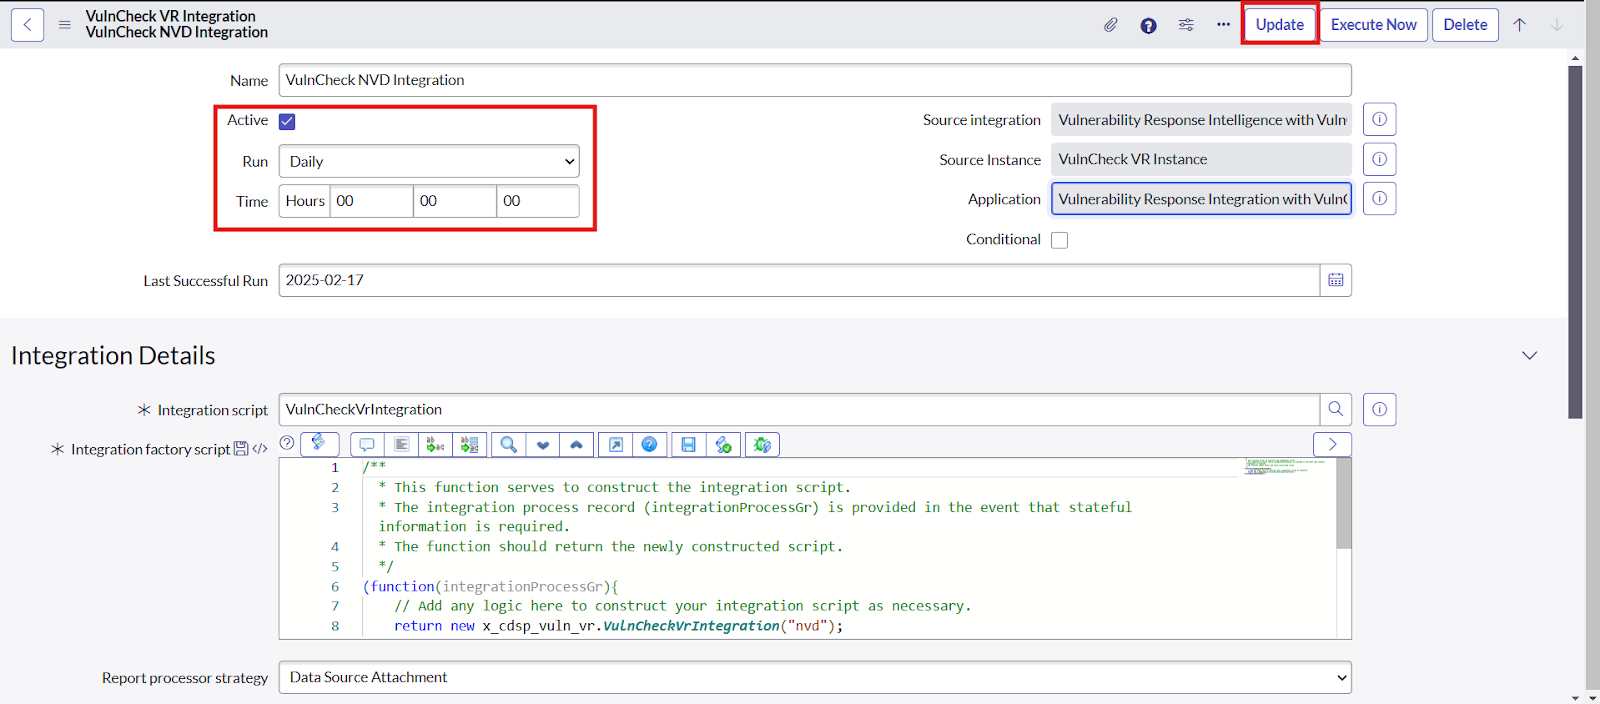
- Open the VulnCheck Integration record. To fetch issues on demand, click the “Execute Now” button.
- To fetch issues at a specific time interval, select the relevant option from the Run dropdown, set the desired time, and click the “Update” button.
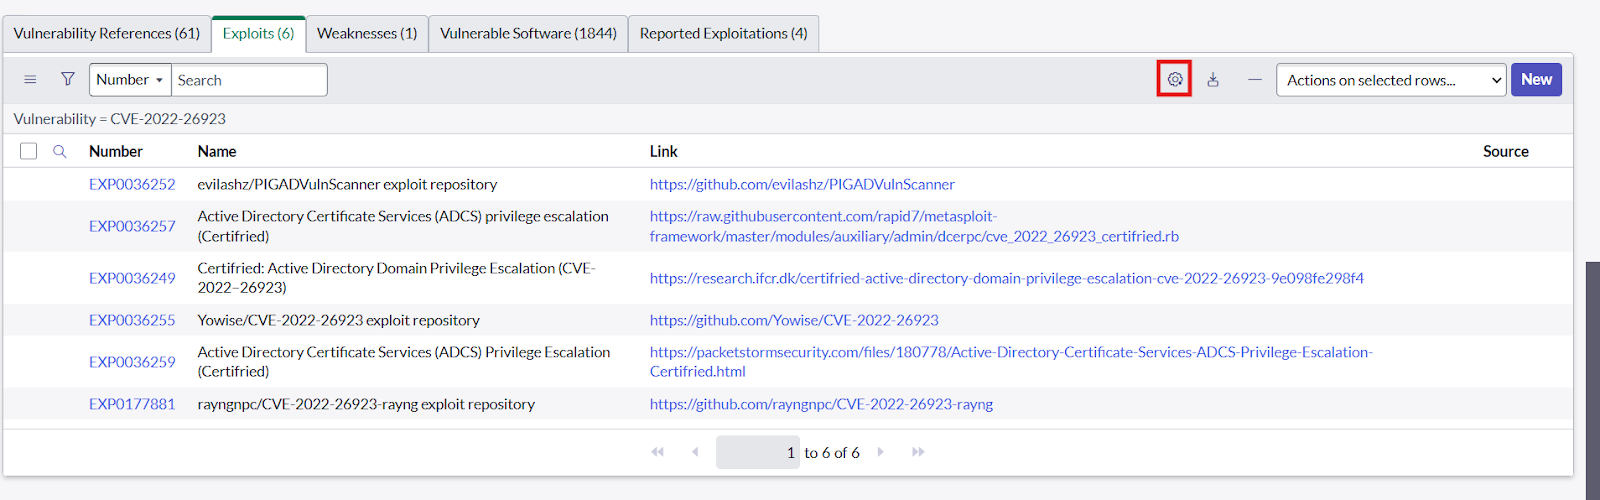
View Vulnerabilities and related data
Users can view the vulnerabilities fetched and related lists: Role Required:x_cdsp_vuln_vr.vulncheck_vr_admin Procedure:
- Navigate to “Vulnerability Response” -> “Libraries” -> NVD
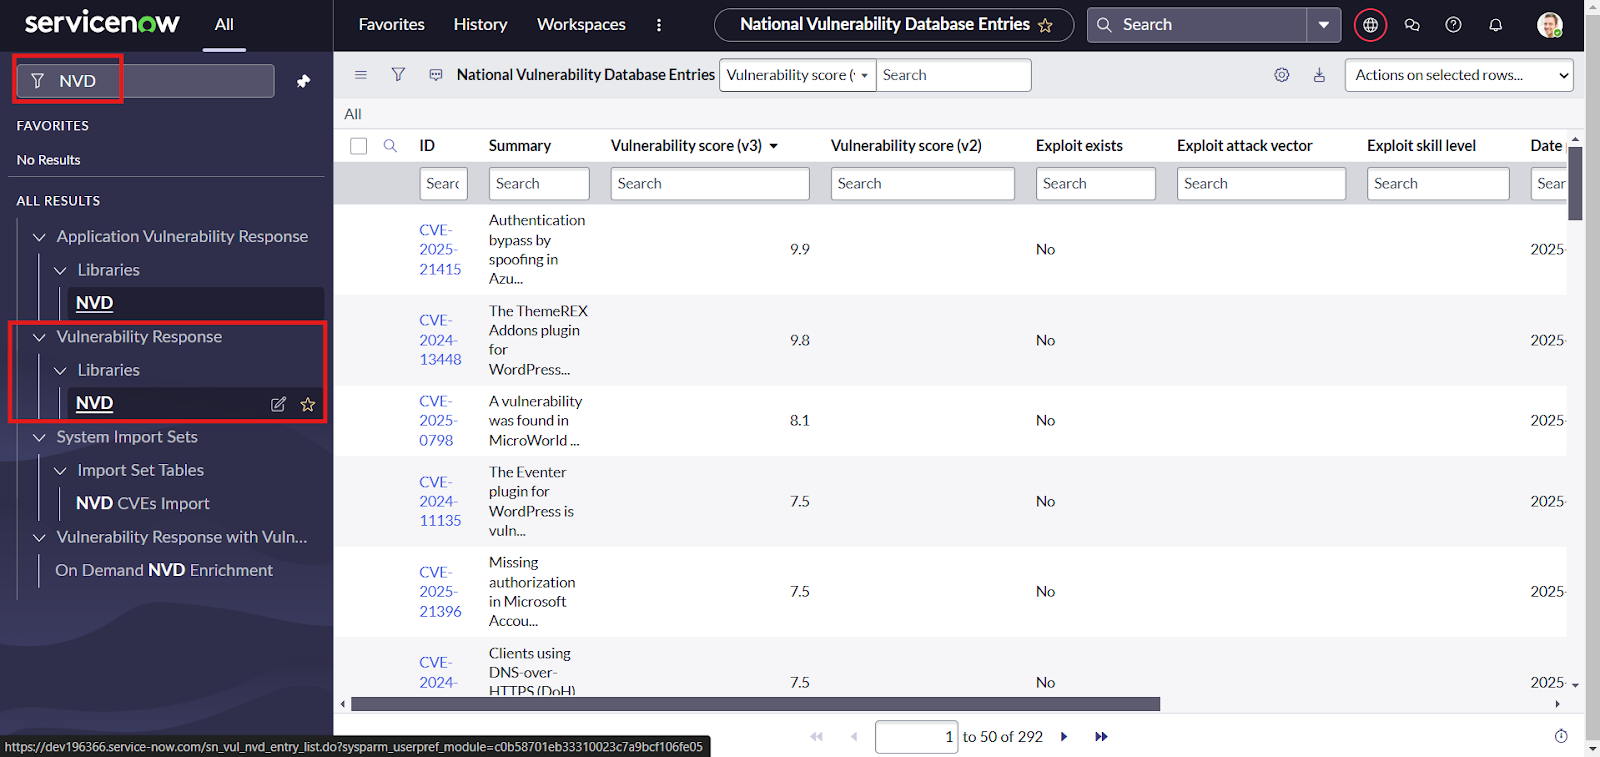
- Then users can search for any specific vulnerability to view using the filter options on SNOW tables and click on the records to view the details of a vulnerability entry information mapped and the related list.
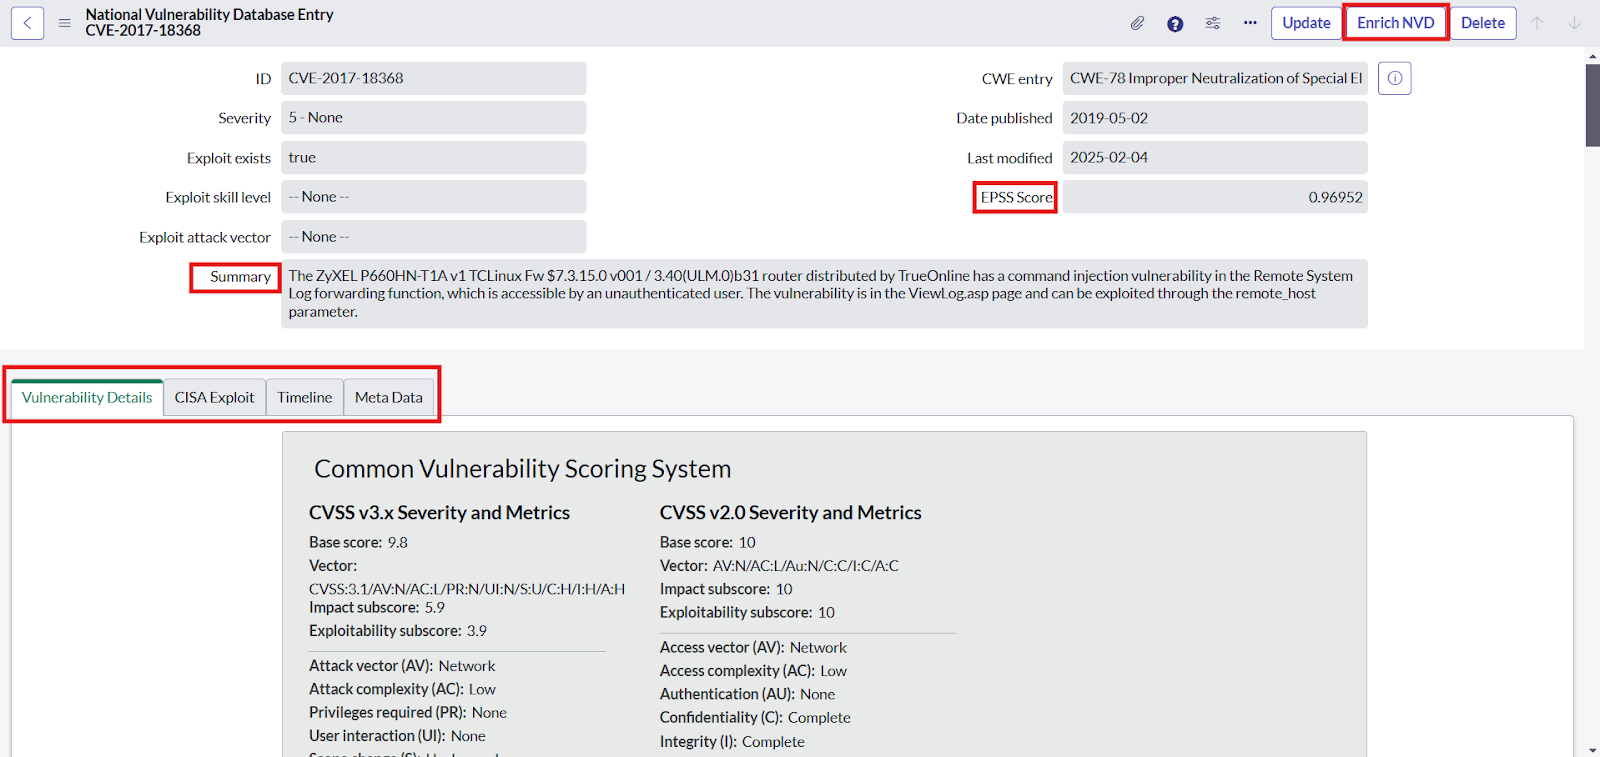
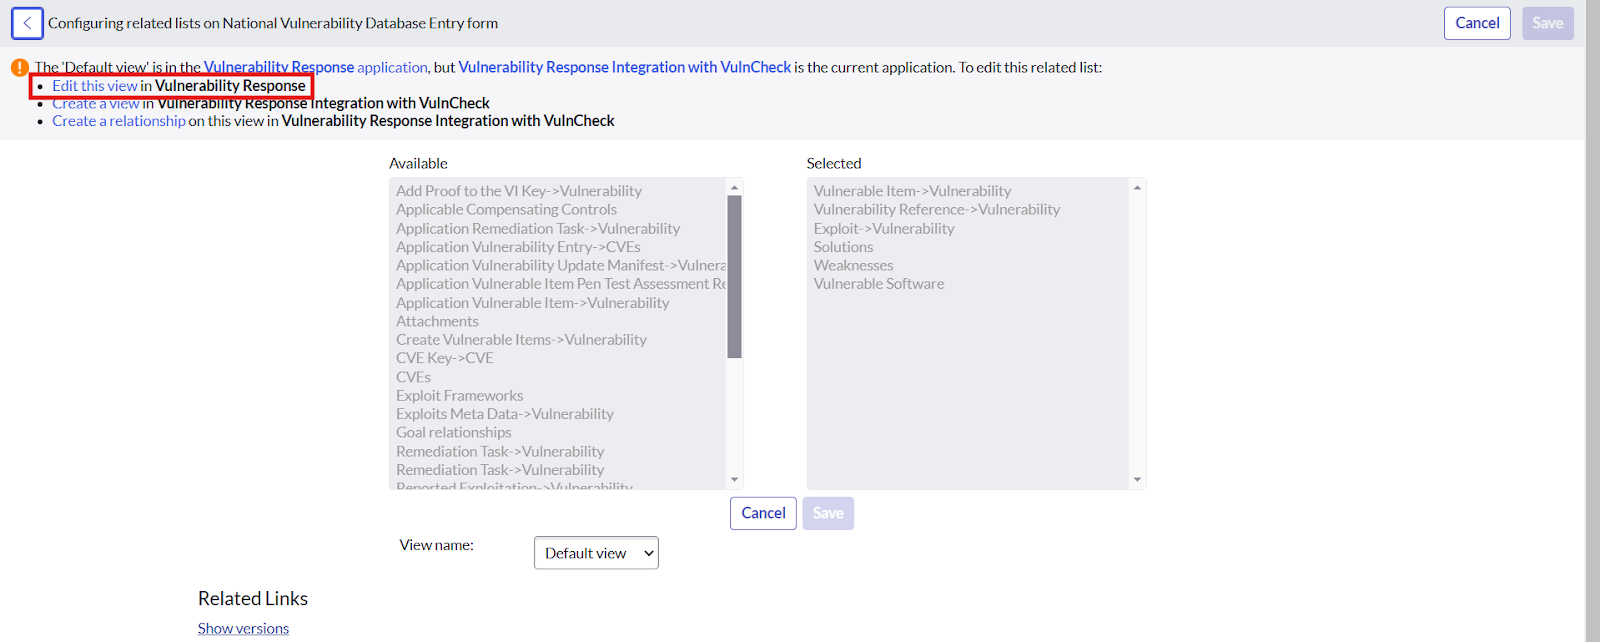
- Users can click on the “Enrich NVD” button on the right corner of a vulnerability entry to enrich a particular NVD.

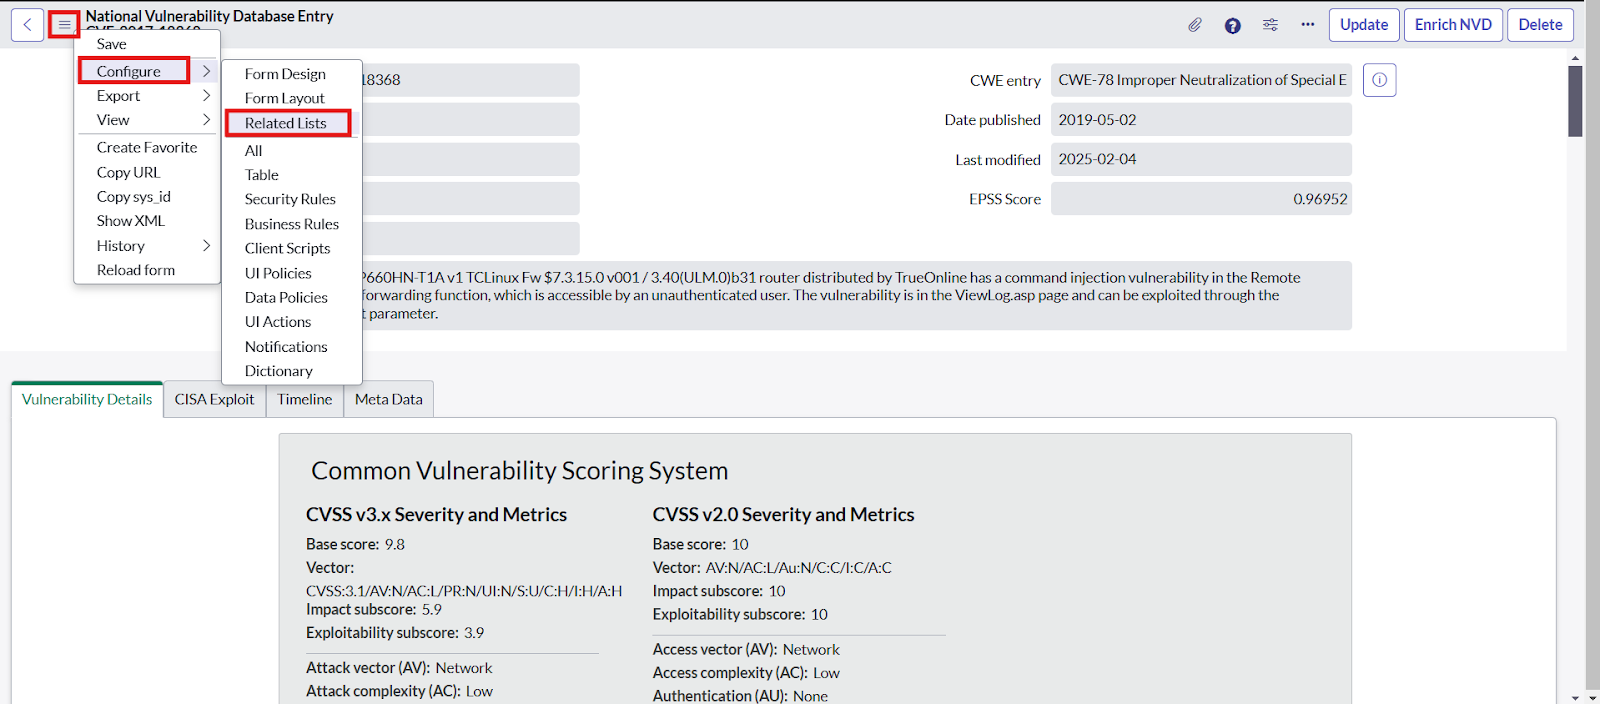
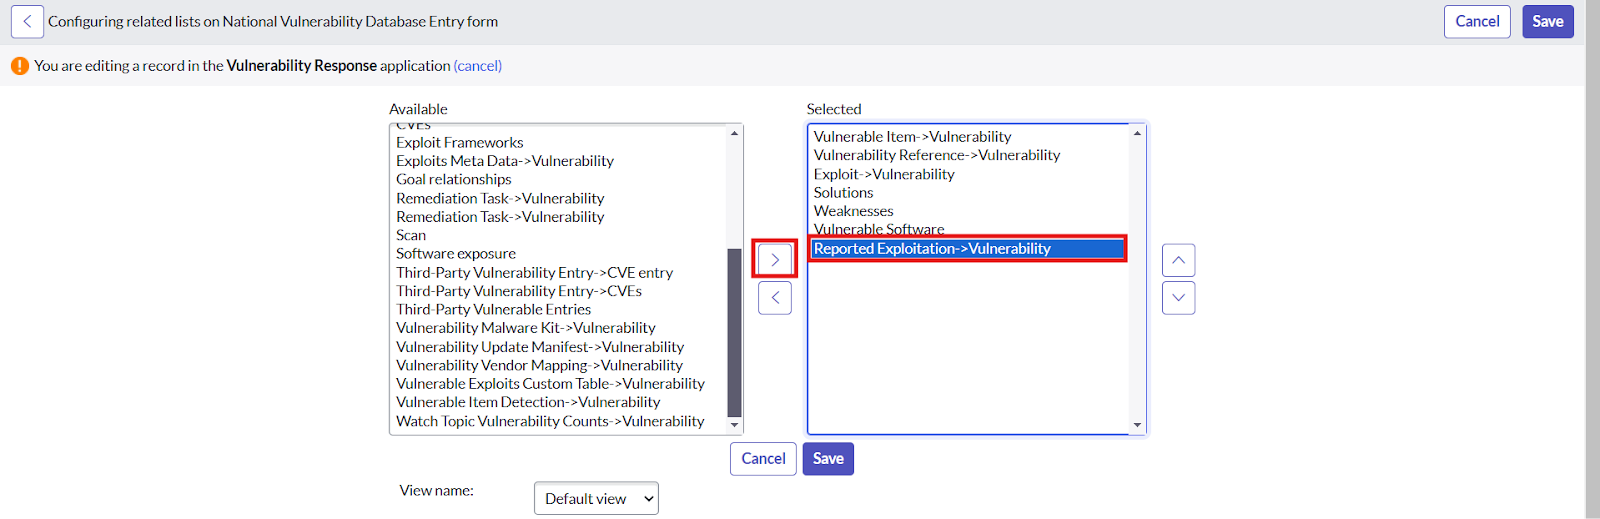
- To add the “Reported Exploitation” related list Click on hamburger button -> Configure -> Related List -> Click on Edit this View in Vulnerability Response -> Select the “Reported Exploitation → Vulnerability list”
Enrich Vulnerabilities by IDs
Users can enrich a set of vulnerabilities by providing valid IDs. Role Required:x_cdsp_vuln_vr.vulncheck_vr_admin Procedure:
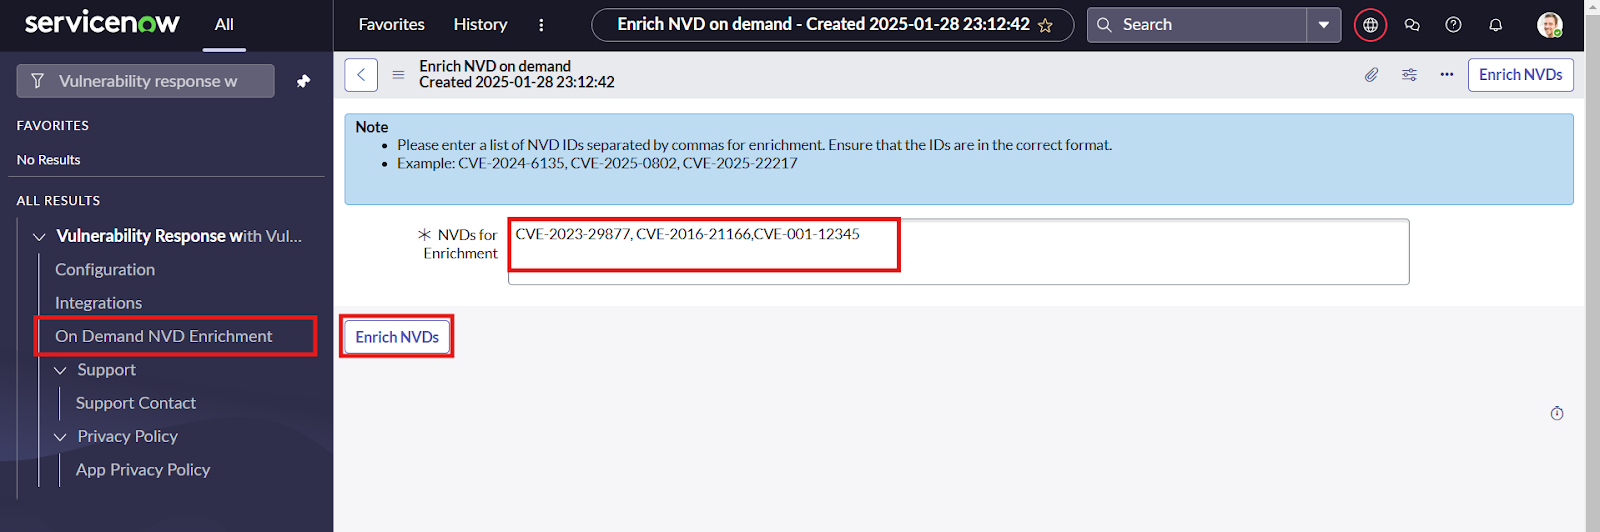
- Navigate to “VulnCheck for Vulnerability Response” and under it click on “On Demand NVD Enrichment” module.
- Provide a set of valid comma separated NVD IDs to run the enrichment on and click on “Enrich NVDs‘.
- A display message will list all the IDs corresponding to the NVDs which are successfully enriched and another message to list all the invalid NVD IDs provided by the user.
Create Vulnerable Items using Exposure Assessment
- To utilize exposure assessment, the prerequisite is to ensure that the following tables are populated:
- cmdb_ci
- cmdb_sam_sw_install
- cmdb_sam_sw_discovery_model
- Set this system property if the exposure assessment is required to not filter out the inactive CIs
- The user needs to navigate to the system properties table by entering sys_properties.LIST.
- Search for the property sn_vul.filter_inactive_sw_installs and set the value to false
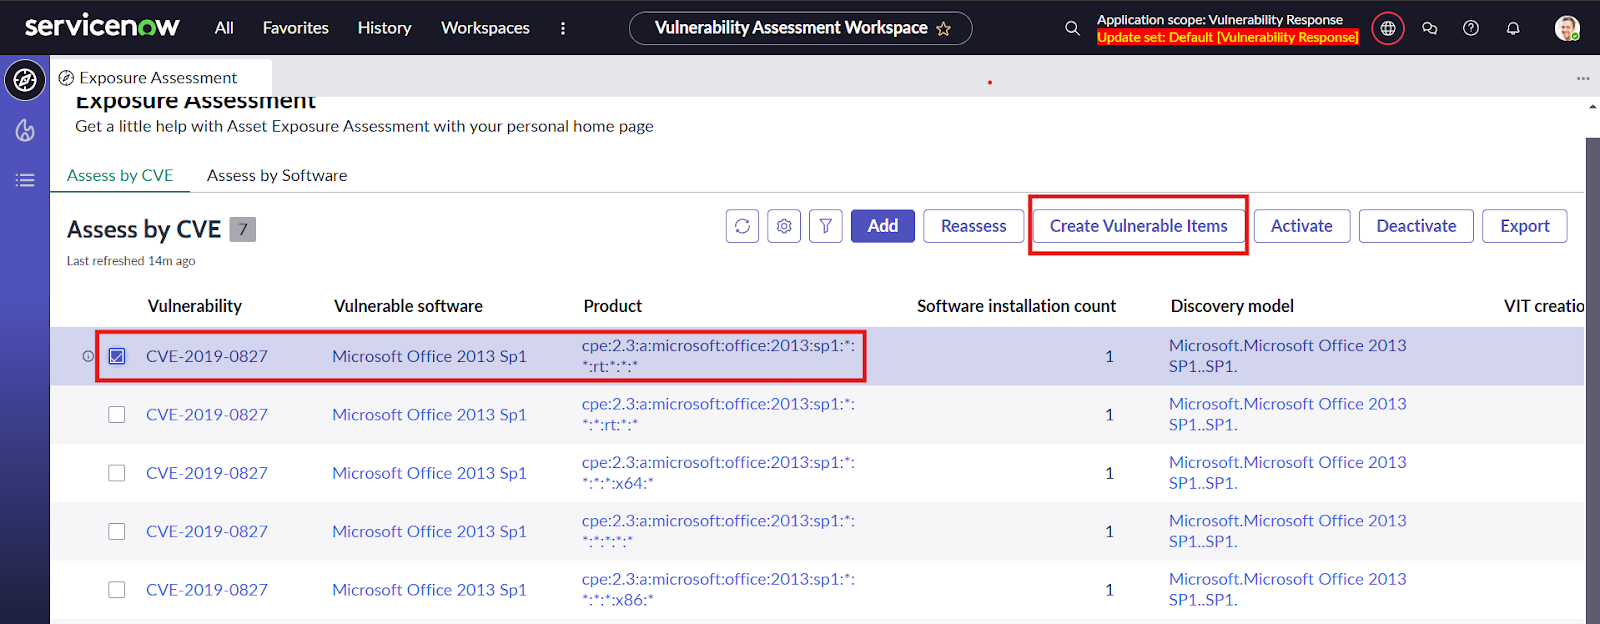
- Follow these steps to create VIT using Exposure Assessment
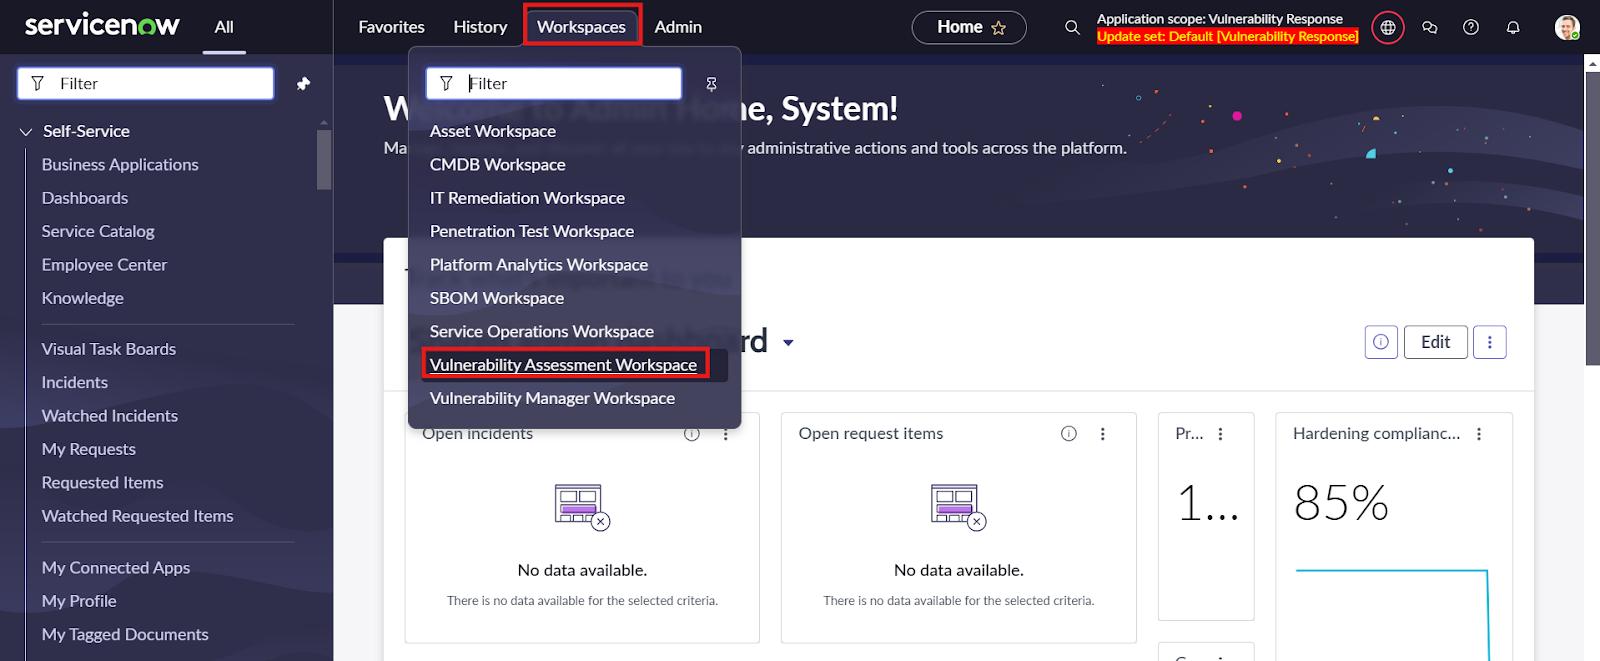
- Navigate to Workspaces and click on Vulnerability Assessment Workspaces
- Under the Assess by CVE tab click on Add button
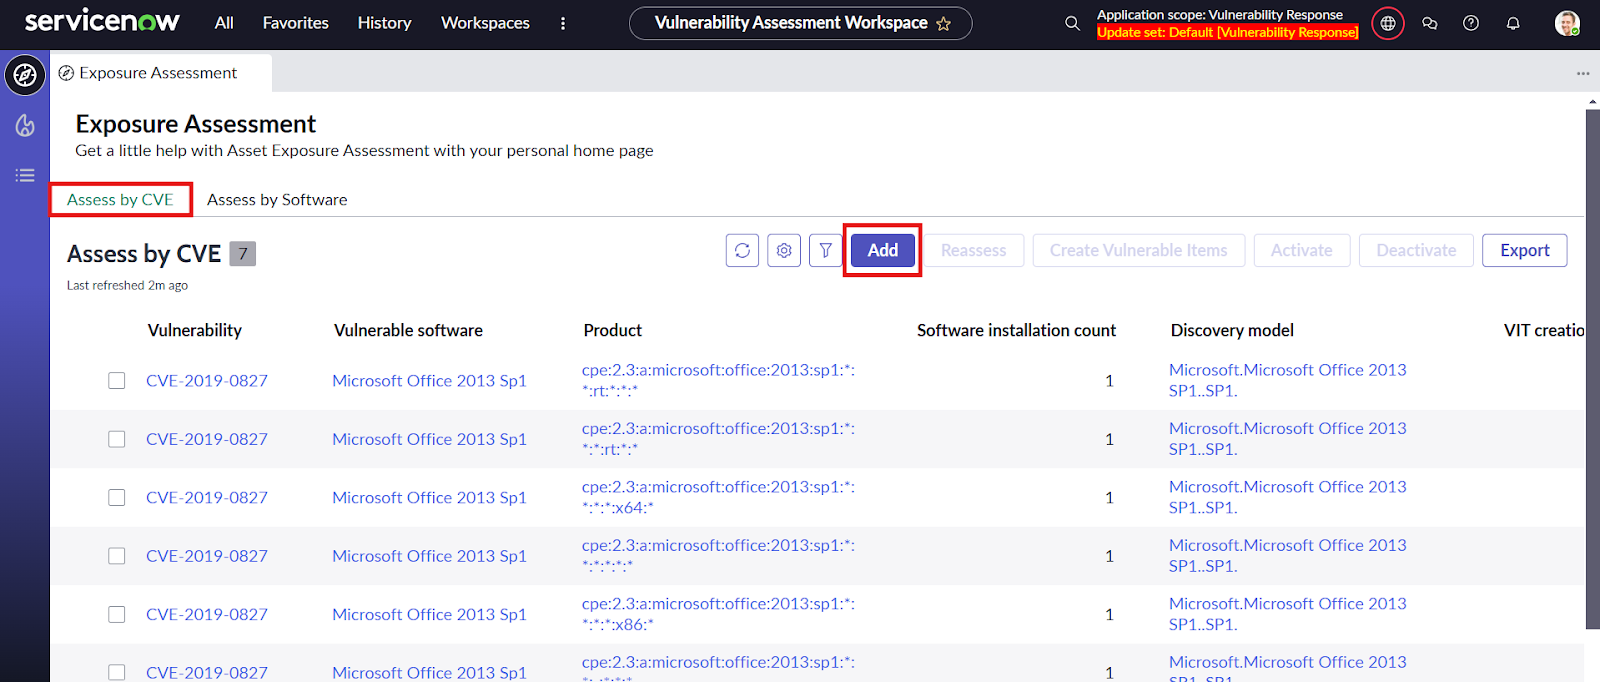
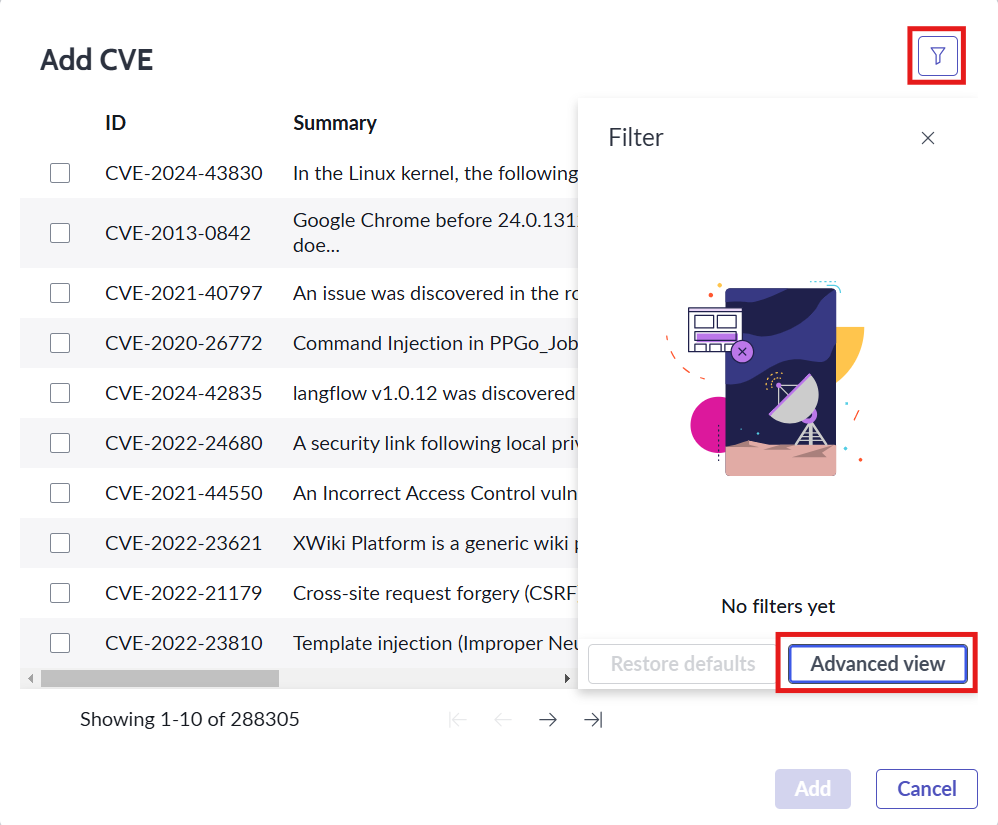
- Select the desired CVE to populate the VIT for if the CVE is not present on the list click on the show filter panel and then click on the Advanced view.
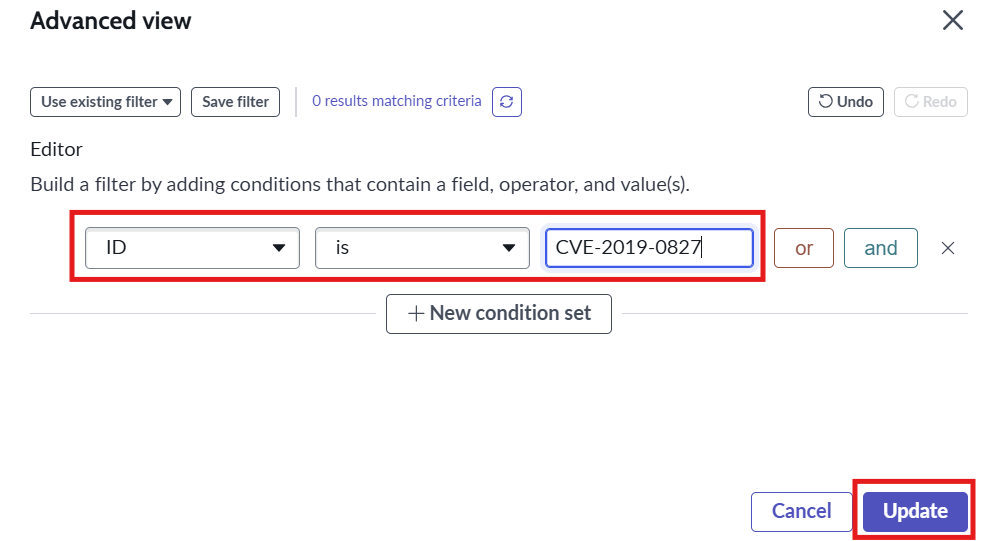
- Next build the filter for desired CVEs for eg: Select ID field and is operator with the CVE id as value and click on update
- Select the required CVE to assess the exposure for and click on Add button
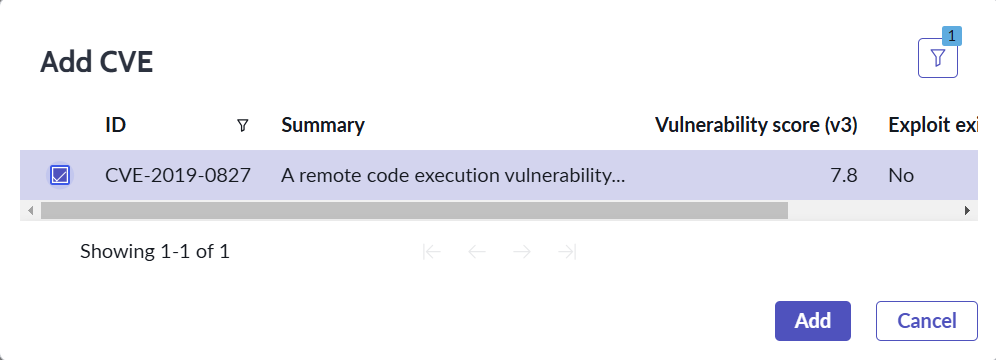
- Next we can see the vulnerable software and products for the CVE and the software installation count, select the desired exposure configuration and click on the Create Vulnerable Items to create the VITs.
Uninstallation
This section describes how to uninstall the “DataBee CMDB Sync” application from a ServiceNow instance.
Role Required: System Administrator (admin) Procedure:
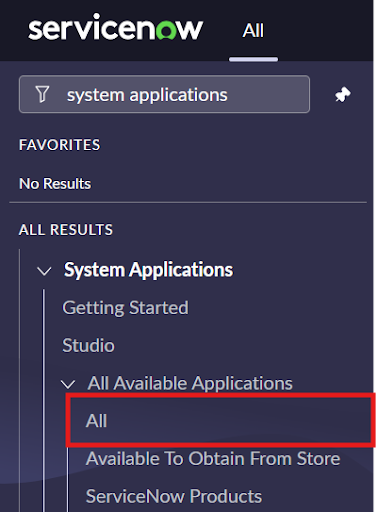
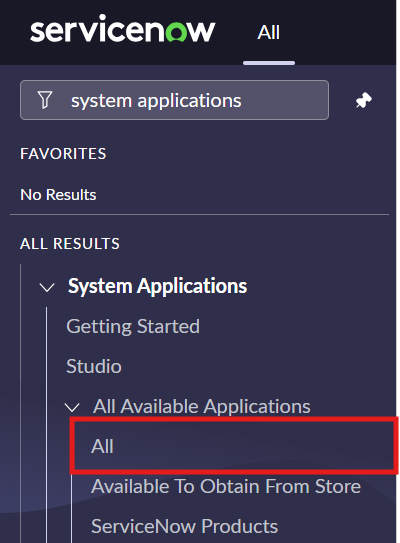
- Navigate to “System Applications” -> “All Available Applications” -> “All”.
- A list of applications installed in the instance is displayed.
- Locate the DataBee CMDB Sync , select it, and click “Uninstall” under the related links.
- The application will be uninstalled from your instance.
Support, troubleshooting and Known Behaviours
Support
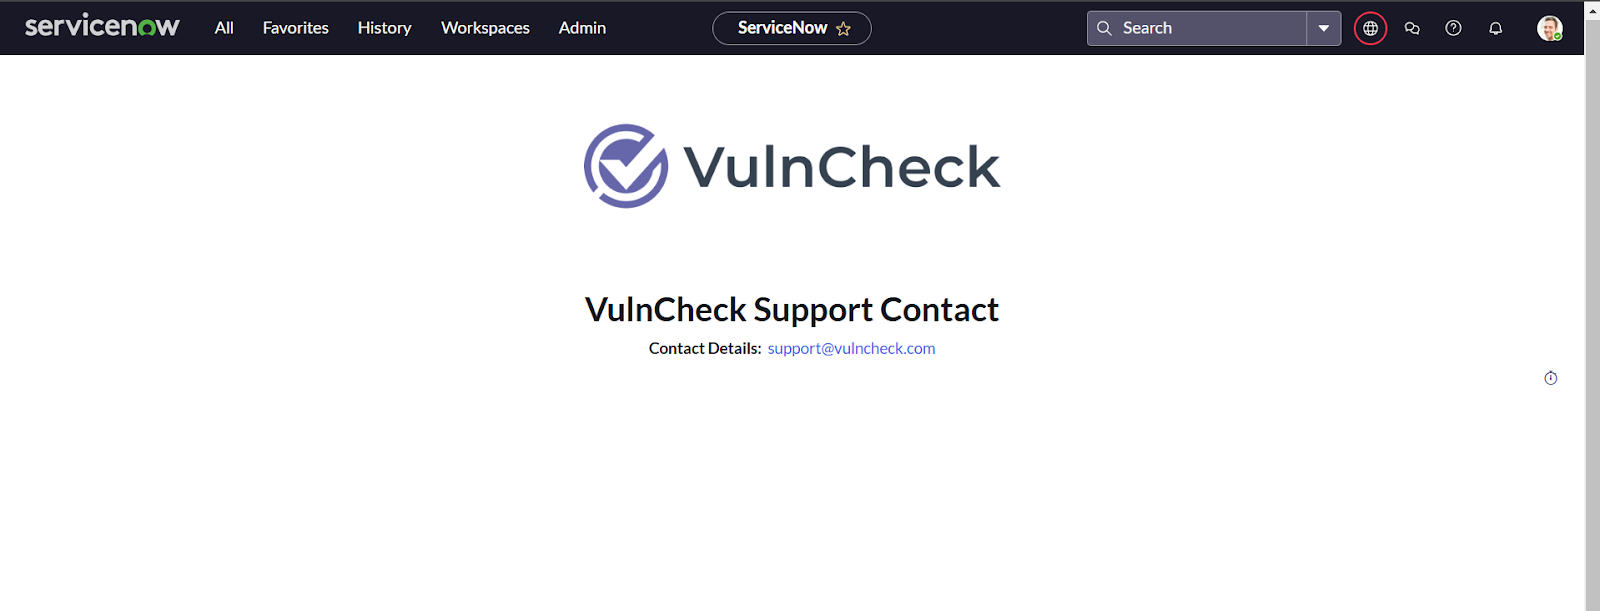
Navigate to “VulnCheck for Vulnerability Response”. For any issues related to the application, navigate to “VulnCheck for Vulnerability Response” then select “Support Contact”.
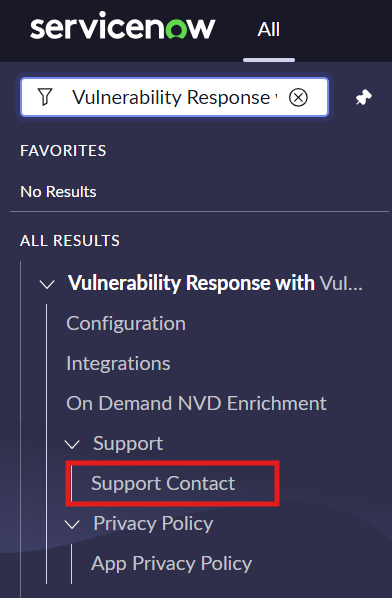
- Support Contact opens with VulnCheck support email address.
Troubleshooting
Unable to install “VulnCheck for Vulnerability Response” from ServiceNow store
- Verify you have the system administrator (admin) role.
- Navigate to “System Definition” then select “All” in your instance.
- Verify if the following application is installed or not. If not, then first install this application.
Unable to create New User
Review the following link and execute the steps. https://www.servicenow.com/docs/bundle/xanadu-customer-service-management/page/administer/users-and-groups/task/t_CreateAUser.html
Unable to install/activate the plugin in ServiceNow Instance
Review the following link and execute the steps. https://www.servicenow.com/docs/bundle/xanadu-platform-administration/page/administer/plugins/task/t_ActivateAPlugin.html
User deletes any of the Integration Records
Uninstall the application and reinstall the application.
Integration ends with ECCResponseTimeOutException
- The user needs to navigate to the system properties table by entering sys_properties.LIST.
- Search for the property glide.http.outbound.max_timeout.enabled and set the value to true. If the property is not available then create a new property of type true|false with the given name in Global scope.
- Next search for the property glide.http.outbound.max_timeout and set a higher value such as 60 or 120. If the property is not available then create a new property of type integer with the given name in Global scope.
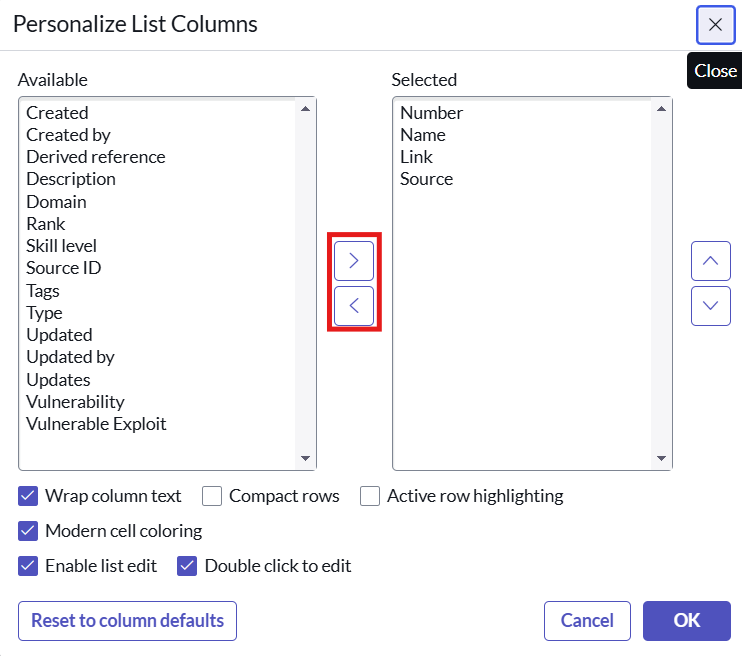
Edit the list view for a related list
- To add/remove the column of a table or of the related list table follow these steps.
- Click on the gear icon on the top right
- Next in the personalize list columns dialog add or remove the columns as desired using the arrow buttons and clock OK.